Instructions for use | DIY Little Dollhouse
We would like to help you get started with these instructions and tips.
Tips 1: Before you start, assemble the house unpainted. This way you know what you are working towards and how everything fits together.
Tip 2: Consider how you want to divide the house in terms of rooms. Keep in mind that there may be an extra floor or extension. That's optional.
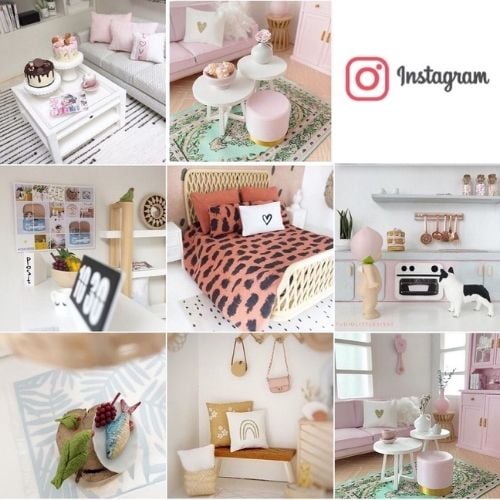
Tip 3: Think about which colors you want to work with. Create a mood board with your favorite items and colors. Search Instagram and Pinterest for the most beautiful pictures. Doesn't necessarily have to be miniatures.... And divide the walls in terms of colors before you start, in your head or on paper. Good preparation is half the job.
Tip 4: Do you want to assemble the house first (start with step 3), or do you first paint all the parts separately? (start at step 1)
Tip 5: TIME!! Take your time with this project. More haste less speed. Work in stages and let everything dry thoroughly in between. You can safely apply the primer in the morning and top it off in the evening. (Provided you use good paint.)
Let's begin
Supplies:
Wood glue. - action of hardware store.
Primer for MDF. - hardware store | You also have quick drying. It works fantastic!!
Topcoat matt or glossy. - construction market.
Sandpaper | fine = 400gr for light sanding | 180gr for drippers.
Wood filler. - action.
Paint roller + tray. - action of hardware store. | good stuff gives a better result!
Brushes for finishing. - action.
Painter's tape. - action.
Sandwich bags. - supermarket.
Tarpaulin/garbage bags for protection. - action of supermarket.
Level. - construction market.
Hammer | if you choose to use the nails.
STEP 1
If you choose to first fully prime all panels, keep in mind that there will be a slight difference in the dimensions due to the paint. (every layer makes a difference)
Make sure you have a workplace where you can work quietly. For example, the dining table is not really suitable. Keep your workplace clean. Make sure there is no dust and that you have enough space to work. Place all the parts on a tarpaulin and stick the stickers there so you can keep an overview. Use the sandwich bags to reuse the rollers, brushes and brushes later.
Paint the front, back and facial edges. Do this in stages and make sure that the panels are placed somewhere so that you can work neatly. When the panels are dry, lightly sand away any imperfections with fine sandpaper and drippers with a coarser grit.
Important: if you paint all the edges of the panels, there will be a difference of 1,000 mm in the house and cracks will appear. That is why we recommend that you only apply paint to the facial edges. In step 6 you can read what you can do about the cracks.
STEP 2
Paint the panels in the color of your choice. If the primer has been properly applied, a layer of topcoat is sufficient. Use a brush to apply the layer well and then a roller for an even effect. Use brushes for finishing.
Important: Work from the inside out. Swipe your brush towards the outer edges, and check the remaining edges for drips and paint residue. If you use too much paint, there will always be drips and paint residue. This will be difficult to sand away later. Do not press the roller too hard on the panel, but let the roller run lightly over the plate for a more even result.
Sand away any imperfections and paint the plates again if you are not yet satisfied.
STEP 3 A
What do you need for the next step?
Wood glue, masking tape, spirit level and a flat surface.
NB!! Place panel G on a flat surface and glue 1 panel B as a base on G and glue 2 panels A against G and B. Make sure the mitered sides are flush with the top. This is very important for the roof. Use 1 panel B as a template (do not use glue), so that your panels A are positioned at a good angle. Use the spirit level to check whether everything is straight and then tape the panels together for reinforcement. Let this dry thoroughly and check regularly whether everything is still in place. Fixed is fixed!!!
STEP 3 B Floors.
Use the 2 panels F as a template to create the correct distance to the first or second floor. These 2 panels also serve as a wall. Can be placed against the back wall, so that the passage is at the front, but also very nice to make flush with the front so that an opening is created at the back. You can choose to leave the walls loose instead of gluing them down, so that you can change again. If you have measured everything correctly, you can easily clamp the walls between them. If you choose to glue the walls, do this before gluing in the next floor. Otherwise you will end up with ugly adhesive residue on your floor and ceiling.
Tip: if you don't want walls on the ground floor, work from top to bottom. Panel E is larger than panels F. So you can create 2 rooms in the attic. It is very important that you adjust that distance first. Then place panel E evenly and in the middle, at the top of the back wall. Then attach Panel B as a floor. Check with the spirit level!!
If you want to create rooms, for example because you want an extra floor (at a later time), work from the bottom up, but take the roof into account. Keep trying and measuring and using your spirit level in between...
STEP 4 The roof
Once step 3 is completely dry, you can choose to place the house upright. You need panel E as a template to get started with the roof. Panel D, the flat roof, will rest on E. Look carefully at how the sloping edges run. Panel D will lie on top of panels C.
Don't worry about small cracks. These cannot be prevented. You can read more about this in step 6. Tape everything securely. There is a risk of subsidence due to gravity. Check regularly during drying. One solution is to put the house down.
STEP 5
Once everything is completely dry, you can give the house extra strength with the supplied nails. This is not necessary and creates more work. If you choose to do so; then drive the nails into the wood calmly and with control or pre-drill small holes. This prevents the wood from splitting.
What also helps is to provide a kind of sealant layer with wood glue. Most wood glues dry transparent. You should check this in advance.
STEP 6
Fill the small cracks and holes in the nails with wood filler. Let this harden thoroughly and lightly sand it one last time. Fill in all imperfections and the edges of the house with a brush.
If you have not yet painted the house and started with step 3, now go to step 1 for painting tips.
Is your house finished? Then you are now ready for styling.....
Extra Floor:
This set consists of 6 shelves. F to I.
F= the dividing wall
H= the bottom and the roof. (2x)
I= the back wall
J= the side walls. (2x)
Step 1
Place H flat. This is your starting point.
Step 2
Glue the back wall (I) to the bottom.
Step 3
The planks J are the side walls. These will be next to the bottom. (H)
Step 4
Use the dividing wall (F) as a template. It will help you install the roof. The roof (H) goes on the back wall and between the 2 side walls. This is how you have created your extra floor. It is wise to determine in advance whether you want to use the dividing wall. Place it against the back wall to create an opening/door at the front of the floor. Place it flush with the front of the floor and you will create an opening at the back of the room. You can also choose to leave the wall loose so that you are free in the layout. This way you can always change.
Extension:
This set consists of 7 shelves. K to R.
K= the bottom
L= the short side wall
M= the back wall
N= the long side wall
O= the flat roof
P= the sloping roof
R= the floor
This extension is for if you want to place the extension on the left side of the house. It is also possible to rotate the planks so that you can place the extension on the right.
Step 1
Place K flat. This is your starting point.
Step 2
Glue the long side wall (N) to the right of the bottom. (K)
Step 3
Place the back wall (M) against the side wall (N) and behind the bottom (K). The sloping side is on the left.
Step 4
The short side wall (L) goes against the bottom and the back wall. This way everything fits together nicely.
Step 5
The flat roof goes on the side and back wall (N&M). The mitered side faces downwards on the left. This means that when viewed from the top, you see a flat plank instead of a sloping side. (So it points downwards.)
Step 6
The sloping roof now only fits one way. On the short side wall (L) and the sloping part of the rear wall (M) & against the flat roof (O).
Step 7
The floor (R) can be placed as desired.